Hi Folks,
This article put some focus on Angular compilation and deployment in production. We will also look into angular.json file. Angular offers 2 ways to compile application
- Just-in-time (JIT) : complies app in browser at runtime and
- Ahead-of-time (AOT): compiles app at build time
JIT compilation is default compilation when ng build or ng serve CLI commands are used. When code compiles in default mode the bigger size output (from dist folder) files got created and which is not so standard. Will talk about soon how Angular build artifacts size can be reduced.
You can use ng audit CLI command to find and fix some of the dependencies.
To do compilation in AOT mode, include –aot option as below:
$> ng build –aot OR ng serve –aot
To make build artifacts size smaller so that code renders faster in browser which minimum or no memory overhead – Angular provide build-in support with –prod meta-flag option.
$> ng build –prod
The –prod complies code in –aot mode by default. The –prod meta-flag provide follwing features:
- Ahead of time compilation : build time compilation of code so at runtime browser just have to render and execute code (not compile)
- Production mode: deploys production environment (will talk soon about deployment of different env profiles)
- Bundling: concatenates all application files and library files into a few bundles.
- Minification: removes excess whitespace, comments, and optional tokens.
- Uglification: rewrites code to use short, cryptic variable and function names.
- Dead code elimination: removes unreferenced modules and much unused code.
When you enable production builds via –prod command line flag, the runtime production mode is enabled as well ( by disabling development specific checks such as the dual change detection cycles.)
Configuring different application Environments
When we create a angular project using CLI command ng new <app-name> it creates src folder having nested folders app, assets and environments
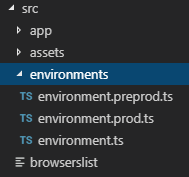
By default it has environment.ts file created and we can create one file per environments like QA, prod, pre-prod etc. Here I have created 2 files for production and pre-production environments.
To use the environment configurations you have defined, your components must import the original environments file as below
import { Component } from ‘@angular/core’;
import { environment } from ‘./../environments/environment’;
@Component({
selector: ‘app-root’,
templateUrl: ‘./app.component.html’,
styleUrls: [‘./app.component.css’]
})
export class AppComponent {
constructor() {
console.log(environment.production);
}
title = ‘My APP!’;
}
The main CLI configuration file, angular.json, contains a fileReplacements section in the configuration for each build target, which allows you to replace any file with a target-specific version of that file and build using ng build –configuration=prod
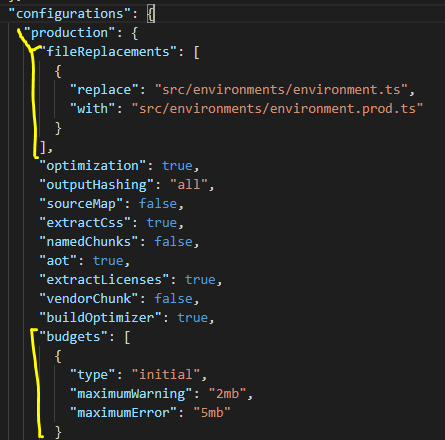
You can control size of application by doing configuration in budgets section ( as shown in above image). by default the max build size restricted here to 5MB and warning if it goes above 2MB.
if you found that final build size is bigger and you cant figure out why then you can use –stats-json flag with build command it will generate stats.json file which you can use with Webpack’s bundle analyzer.
To install, use npm i -D webpack-bundle-analyzer and then inside packages.json file, add “stats”: “webpack-bundle-analyzer dist/[change your path name to match]/stats.json” under scripts.
Then run npm stats and it will boot up a localhost that will allow you to zoom in and out to see visually where all the KBs are being used. It can let you identify bloats in your application and potential space taking libraries, components or application parts.
Performance Measures
To optimize the application and to find out why its slow, you can use source-map-explorer tool to inspect generated JavaScript bundles after production build
npm install source-map-explorer –save-dev
Build your app for production including the source maps
ng build –prod –source-map
List the generated bundles in the dist/ folder.
ls dist/*.bundle.js
Run the explorer to generate a graphical representation of one of the bundles. The following example displays the graph for the main bundle.
node_modules/.bin/source-map-explorer dist/main.*.bundle.js
The source-map-explorer analyzes the source map generated with the bundle and draws a map of all dependencies, showing exactly which classes are included in the bundle.
In this way you can make your Angular more production oriented application.
Thanks !!!
